This NanoClaw setup guide walks you through installing and configuring NanoClaw on macOS, Windows, and Linux, step by step. By the end of this tutorial, you will have your own AI agent running in a secure container, accessible through WhatsApp, Telegram, or any messaging platform you choose. Whether you are a developer building personal automations or a non-technical user who wants a private AI assistant, this is the definitive resource from AI Tools Hub to get you started.
NanoClaw is a lightweight, open-source project that gives you the same power as large AI agent platforms but in a codebase small enough to actually understand. Instead of half a million lines of code and dozens of configuration files, NanoClaw is a single Node.js process with a handful of source files. Your agents run in isolated Linux containers with real OS-level security, not just application-level permission checks.
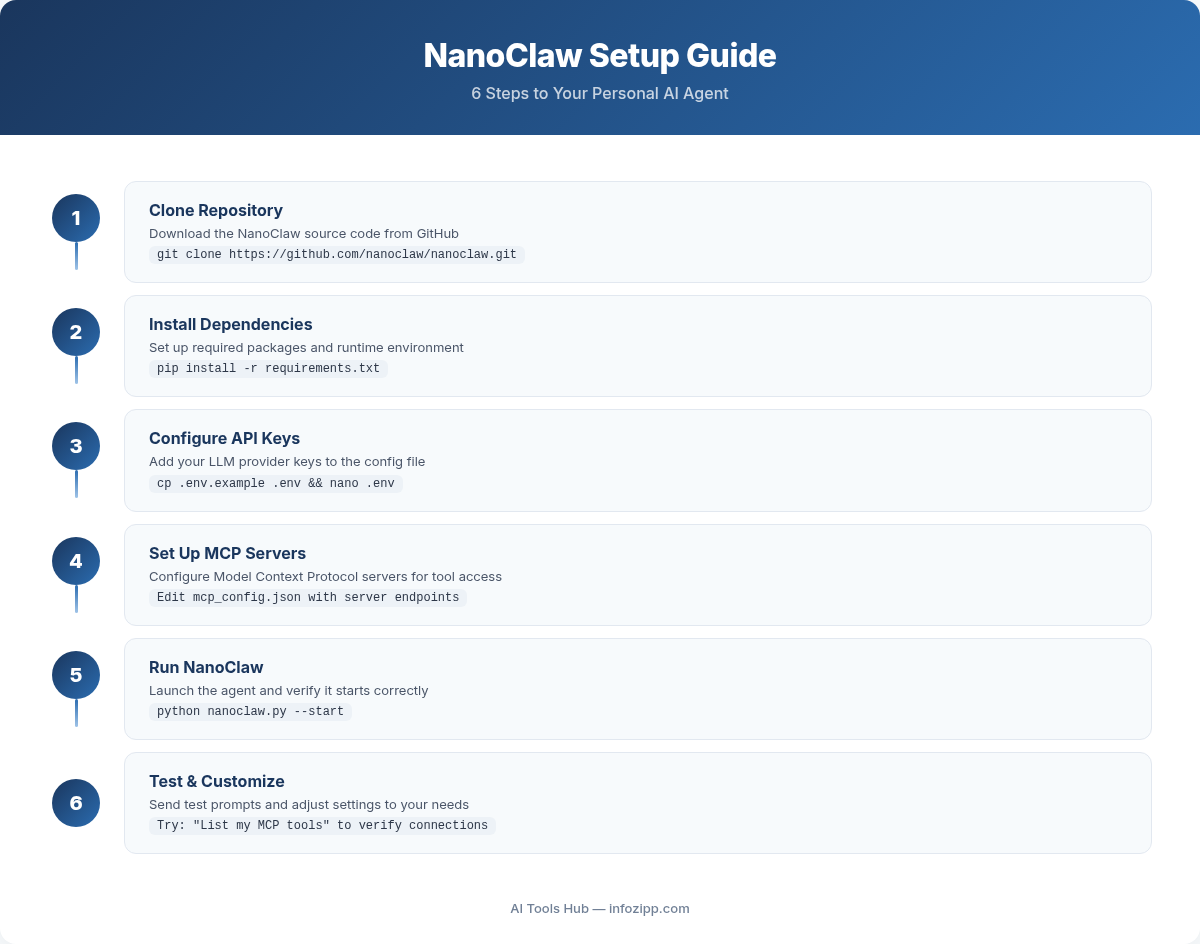
Let us get started.
What You Will Build
By following this NanoClaw setup guide tutorial, you will end up with:
- A personal AI agent powered by Claude that runs 24/7 on your machine
- WhatsApp and/or Telegram integration so you can talk to your agent from your phone
- Secure container isolation where each conversation group gets its own sandboxed environment
- Scheduled tasks that can check news, generate reports, or run automations on a recurring basis
- Agent swarms capable of spinning up teams of specialized AI agents that collaborate on complex tasks
- Full customization because the code is yours to modify however you want
Here is the architecture at a glance:
Channels (WhatsApp, Telegram, etc.) --> SQLite --> Polling loop --> Container (Claude Agent SDK) --> ResponseSimple, transparent, and fully under your control.
Prerequisites Checklist
Before diving into the platform-specific instructions, make sure you have the following ready:
Required for All Platforms
- Claude API key or an active Claude Pro/Max subscription (for Claude Code access)
- GitHub account (free tier is fine)
- Node.js 20 or newer
- Git installed and configured
- GitHub CLI (gh) recommended for the smoothest experience
Platform-Specific Requirements
| Platform | Container Runtime | Notes |
|---|---|---|
| macOS (Intel/Apple Silicon) | Docker Desktop or Apple Container | Apple Container recommended for Apple Silicon |
| Windows | Docker via WSL2 | Requires WSL2 with Ubuntu |
| Linux | Docker | Docker Engine or Docker Desktop |
Getting Your Claude API Key
If you do not already have a Claude API key:
- Go to console.anthropic.com
- Create an account or sign in
- Navigate to API Keys in the left sidebar
- Click Create Key and copy the key somewhere safe
- Add billing credits (you only pay for what you use)
Alternatively, if you have a Claude Pro or Max subscription, Claude Code is included and you can authenticate directly through the CLI without a separate API key.
macOS Setup (Intel and Apple Silicon)
macOS is the most polished NanoClaw experience, especially on Apple Silicon Macs where you can use Apple Container for a lighter-weight native runtime.
Step 1: Install Homebrew
If you do not have Homebrew yet, open Terminal and run:
/bin/bash -c "$(curl -fsSL https://raw.githubusercontent.com/Homebrew/install/HEAD/install.sh)"Follow the on-screen instructions. When it finishes, verify the installation:
brew --versionStep 2: Install Node.js 20+
brew install node@20Verify it installed correctly:
node --version
# Should output v20.x.x or higher
Step 3: Install a Container Runtime
You have two options on macOS:
Option A: Docker Desktop (Intel or Apple Silicon)
- Download Docker Desktop for Mac
- Install and launch it
- Verify it is running:
docker --version
docker run hello-world
Option B: Apple Container (Apple Silicon recommended)
Apple Container is a lighter-weight alternative that runs natively on Apple Silicon. You can install it after the initial setup by running the /convert-to-apple-container skill inside Claude Code. This converts your Docker-based setup to Apple Container automatically.
Step 4: Install GitHub CLI
brew install gh
gh auth login
Follow the prompts to authenticate with your GitHub account. This makes forking and cloning seamless.
Step 5: Install Claude Code CLI
npm install -g @anthropic-ai/claude-codeVerify the installation:
claude --versionIf this is your first time using Claude Code, run claude once to complete the authentication flow. It will open your browser to sign in.
Step 6: Fork and Clone NanoClaw
This is the key step. NanoClaw is designed to be forked so you have your own copy to customize:
gh repo fork qwibitai/nanoclaw --clone
cd nanoclaw
If you do not have the GitHub CLI, you can do this manually:
- Go to github.com/qwibitai/nanoclaw
- Click the Fork button in the top right
- Clone your fork:
git clone https://github.com/YOUR-USERNAME/nanoclaw.git
cd nanoclaw
Step 7: Run the Setup
Start Claude Code inside the NanoClaw directory:
claudeThen type the setup skill:
/setup[Screenshot: Claude Code terminal showing the /setup command running, with progress messages about installing dependencies, building containers, and configuring the environment]
Claude Code handles everything from here: installing dependencies, building containers, configuring your environment, and setting up the database. More details on what happens during setup are covered in the dedicated section below.
Optional: Convert to Apple Container
If you are on Apple Silicon and want the lighter native runtime:
/convert-to-apple-containerThis skill modifies your local fork to use Apple Container instead of Docker. It is completely reversible.
Windows Setup (via WSL2)
NanoClaw runs on Windows through WSL2 (Windows Subsystem for Linux). WSL2 provides a full Linux kernel that runs Docker containers natively, giving you the same experience as a Linux setup.
Step 1: Set Up WSL2
If you have not already installed WSL2, open PowerShell as Administrator and run:
wsl --installThis installs WSL2 with Ubuntu by default. Restart your computer when prompted.
After restarting, Ubuntu will launch automatically and ask you to create a username and password.
Tip: If you need a more detailed WSL2 walkthrough covering edge cases, troubleshooting, and optimization, check our dedicated WSL2 setup guide.
Step 2: Install Node.js Inside WSL2
Open your WSL2 Ubuntu terminal and run:
curl -fsSL https://deb.nodesource.com/setup_20.x | sudo -E bash -
sudo apt-get install -y nodejs
Verify:
node --version
npm --version
Step 3: Install Docker Inside WSL2
You have two approaches:
Option A: Docker Desktop with WSL2 Backend (easier)
- Install Docker Desktop on Windows
- Open Docker Desktop Settings → Resources → WSL Integration
- Enable integration with your Ubuntu distro
- Verify in WSL2 terminal:
docker --version
docker run hello-world
Option B: Docker Engine directly in WSL2 (lighter)
sudo apt-get update
sudo apt-get install -y ca-certificates curl gnupg
sudo install -m 0755 -d /etc/apt/keyrings
curl -fsSL https://download.docker.com/linux/ubuntu/gpg | sudo gpg --dearmor -o /etc/apt/keyrings/docker.gpg
sudo chmod a+r /etc/apt/keyrings/docker.gpg

echo \
  "deb [arch=$(dpkg --print-architecture) signed-by=/etc/apt/keyrings/docker.gpg] https://download.docker.com/linux/ubuntu \
  $(. /etc/os-release && echo "$VERSION_CODENAME") stable" | \
  sudo tee /etc/apt/sources.list.d/docker.list > /dev/null

sudo apt-get update
sudo apt-get install -y docker-ce docker-ce-cli containerd.io docker-buildx-plugin docker-compose-plugin

sudo usermod -aG docker $USER
newgrp docker
Verify Docker works without sudo:
docker run hello-worldStep 4: Install GitHub CLI
sudo apt-get install -y gh
gh auth login
Step 5: Install Claude Code CLI
npm install -g @anthropic-ai/claude-code
claude --version
Step 6: Fork, Clone, and Run Setup
gh repo fork qwibitai/nanoclaw --clone
cd nanoclaw
claude
Inside Claude Code:
/setupImportant Windows-specific notes:
- Always run NanoClaw from inside the WSL2 filesystem (e.g.,
~/nanoclaw), not from a Windows-mounted path like/mnt/c/. Performance is dramatically better on the native WSL2 filesystem. - If Docker commands hang or fail, make sure the Docker service is running:
sudo service docker start - WSL2 can be memory-hungry. You can limit it by creating a
.wslconfigfile in your Windows home directory (C:\Users\YourName\.wslconfig):
[wsl2]
memory=8GB
processors=4
Linux Setup (Ubuntu/Debian)
Linux is the most straightforward platform for NanoClaw since containers run natively without any virtualization layer.
Step 1: Install Node.js 20+
curl -fsSL https://deb.nodesource.com/setup_20.x | sudo -E bash -
sudo apt-get install -y nodejs
For Fedora/RHEL-based systems:
curl -fsSL https://rpm.nodesource.com/setup_20.x | sudo bash -
sudo dnf install -y nodejs
Verify:
node --versionStep 2: Install Docker
For Ubuntu/Debian:
sudo apt-get update
sudo apt-get install -y ca-certificates curl gnupg
sudo install -m 0755 -d /etc/apt/keyrings
curl -fsSL https://download.docker.com/linux/ubuntu/gpg | sudo gpg --dearmor -o /etc/apt/keyrings/docker.gpg
sudo chmod a+r /etc/apt/keyrings/docker.gpg

echo \
  "deb [arch=$(dpkg --print-architecture) signed-by=/etc/apt/keyrings/docker.gpg] https://download.docker.com/linux/ubuntu \
  $(. /etc/os-release && echo "$VERSION_CODENAME") stable" | \
  sudo tee /etc/apt/sources.list.d/docker.list > /dev/null

sudo apt-get update
sudo apt-get install -y docker-ce docker-ce-cli containerd.io docker-buildx-plugin docker-compose-plugin
Add your user to the Docker group so you do not need sudo:
sudo usermod -aG docker $USER
newgrp docker
Verify:
docker run hello-worldStep 3: Install GitHub CLI
sudo apt-get install -y gh
gh auth login
Step 4: Install Claude Code CLI
npm install -g @anthropic-ai/claude-code
claude --version
Step 5: Fork, Clone, and Run Setup
gh repo fork qwibitai/nanoclaw --clone
cd nanoclaw
claude
Inside Claude Code:
/setupLinux-specific tips:
- If you are running on a headless server (no GUI), Claude Code authentication will give you a URL to open on another device
- Make sure ports 3000+ are available if you plan to expose any web interfaces
- For running NanoClaw as a persistent service, consider using
tmuxorscreen, or set up a systemd service
The /setup Experience: What Happens Behind the Scenes
When you type /setup inside Claude Code, here is what happens step by step:
- Dependency check – Claude verifies Node.js, Docker (or Apple Container), and Git are installed and at the right versions. If anything is missing, it will guide you through installing it.
- npm install – Installs all Node.js dependencies from
package.json. - Environment configuration – Creates a
.envfile with your API keys and settings. Claude will ask you for your Anthropic API key if it is not already configured. - Container image build – Builds the Linux container image that agents will run inside. This is the sandbox where all agent code executes.
- Database initialization – Sets up the SQLite database that stores messages, groups, sessions, and state.
- First run test – Starts NanoClaw briefly to verify everything works, then hands control back to you.
[Screenshot: Terminal showing the /setup process completing successfully with green checkmarks next to each step]
The entire process typically takes 3 to 10 minutes depending on your internet speed and whether Docker images need to be downloaded.
If setup fails: Do not panic. Claude Code will attempt to dynamically diagnose and fix issues. If it cannot resolve the problem automatically, run /debug inside Claude Code for a deeper investigation.
Connecting WhatsApp
WhatsApp is the most popular channel for NanoClaw. Here is how to connect it:
Step 1: Run the WhatsApp Skill
Inside Claude Code (with NanoClaw running):
/add-whatsappThis skill modifies your fork to include WhatsApp integration using the Baileys library (an open-source WhatsApp Web API).
Step 2: Scan the QR Code
After the skill runs, NanoClaw will display a QR code in your terminal.
[Screenshot: Terminal displaying a QR code for WhatsApp Web pairing]
- Open WhatsApp on your phone
- Go to Settings → Linked Devices → Link a Device
- Scan the QR code displayed in your terminal
Step 3: Send Your First Message
Once paired, open a chat with yourself (your own number, the “self-chat”) in WhatsApp. This becomes your main channel for admin control. Type:
@Andy hello, are you there?The default trigger word is @Andy. Your agent should respond within a few seconds.
Important: The self-chat (messaging yourself) is your private admin channel. Any other WhatsApp group you add the agent to becomes an isolated group with its own memory and filesystem.
Adding Telegram
Want Telegram as well? NanoClaw supports multiple channels simultaneously.
Step 1: Create a Telegram Bot
- Open Telegram and search for @BotFather
- Send
/newbot - Follow the prompts to name your bot
- Copy the bot token BotFather gives you
Step 2: Run the Telegram Skill
Inside Claude Code:
/add-telegramClaude will ask for your Telegram bot token. Paste it when prompted.
Step 3: Start Chatting
Find your bot on Telegram and send it a message:
@Andy what can you do?Your agent is now accessible from both WhatsApp and Telegram simultaneously, with each channel maintaining separate conversation contexts.
First Interactions: Testing Your Agent
Now that your agent is running, here are some messages to test its capabilities:
Basic Conversation
@Andy what is the weather forecast for Tokyo this week?This tests web access. NanoClaw agents can search and fetch content from the web.
Task Management
@Andy remind me every weekday at 9am to review my calendarThis creates a scheduled task (more on this below).
File and Data Work
@Andy create a markdown file summarizing the key points from our conversation todayAgents can create and modify files within their isolated container filesystem.
Complex Requests
@Andy search Hacker News for the top AI stories today, summarize the top 5, and format them as a newsletterThis tests the agent’s ability to chain multiple actions: web search, content extraction, summarization, and formatting.
Customization: Making NanoClaw Your Own
One of NanoClaw’s core principles is that customization happens through code changes, not configuration files. Since the codebase is small enough to understand completely, you can safely modify it.
Using CLAUDE.md for Memory
Each group in NanoClaw has its own CLAUDE.md file located in groups/<group-name>/CLAUDE.md. This file serves as persistent memory for that group’s agent. You can:
- Add instructions that the agent should always follow
- Store reference information the agent needs
- Define the agent’s personality or communication style
Example CLAUDE.md:
# Agent Instructions

- Always respond in a concise, professional tone
- When asked about schedules, check the calendar.md file first
- Format all dates in YYYY-MM-DD format
- Sign off messages with a motivational quote on Mondays
Changing the Trigger Word
The default trigger word is @Andy. To change it, simply tell Claude Code:
Change the trigger word to @JarvisClaude will find the relevant code and update it across the codebase.
Running the /customize Skill
For guided customization, run:
/customizeThis walks you through common changes you might want to make.
Direct Code Modifications
Since the codebase is small, you can ask Claude Code to make any change:
- “Add a custom greeting when I say good morning”
- “Remember to make responses shorter and more direct”
- “Store conversation summaries weekly”
- “Add a command that lists all files in the agent’s workspace”
The key source files you might want to explore:
| File | Purpose |
|---|---|
src/index.ts | Orchestrator: state management, message loop, agent invocation |
src/channels/registry.ts | Channel registry (self-registration at startup) |
src/ipc.ts | IPC watcher and task processing |
src/router.ts | Message formatting and outbound routing |
src/container-runner.ts | Spawns streaming agent containers |
src/task-scheduler.ts | Runs scheduled tasks |
src/db.ts | SQLite operations (messages, groups, sessions, state) |
Agent Swarms: Multi-Agent Collaboration
One of NanoClaw’s most powerful features is agent swarms. Instead of relying on a single agent, you can spin up teams of specialized agents that work together.
How Swarms Work
When you give your agent a complex task, it can spawn additional specialized agents, each running in their own isolated container. For example:
@Andy I need a comprehensive market analysis report on the electric vehicle industry. Research competitors, analyze financial data, and create visualizations.NanoClaw might spawn:
- A researcher agent that searches the web and gathers data
- A data analyst agent that processes numbers and creates charts
- A writer agent that compiles everything into a polished report
Each agent works in parallel in its own container, and results are combined into a cohesive output.
Security of Swarms
Every swarm agent inherits the same container isolation as the parent. They can only access explicitly mounted directories and cannot interact with your host system. This makes swarms both powerful and safe.
Scheduled Tasks: Automating Your Life
Scheduled tasks are recurring jobs that run Claude and can message you back with results. This is where NanoClaw really shines as a personal automation platform.
Creating a Scheduled Task
Just tell your agent what you want and when:
@Andy every Monday at 8am, compile news on AI developments from Hacker News and TechCrunch and message me a briefing@Andy send an overview of the sales pipeline every weekday morning at 9am@Andy review the git history for the past week each Friday and update the README if there is driftManaging Scheduled Tasks
From your main channel (self-chat), you can manage all tasks:
@Andy list all scheduled tasks across groups@Andy pause the Monday briefing task@Andy delete the Friday git review taskThe task scheduler (src/task-scheduler.ts) handles execution timing, and each task runs in its own container instance for isolation.
Using Third-Party or Open-Source Models
NanoClaw supports any Claude API-compatible model endpoint. To use alternative models, set these environment variables in your .env file:
ANTHROPIC_BASE_URL=https://your-api-endpoint.com
ANTHROPIC_AUTH_TOKEN=your-token-here
Compatible providers include:
- Ollama for local models (with an API proxy)
- Together AI for hosted open-source models
- Fireworks for high-performance inference
- Any custom deployment with an Anthropic-compatible API
Note: The model must support the Anthropic API format for best compatibility. Claude models will always give the best results since NanoClaw is built on the Claude Agent SDK.
Troubleshooting Common Issues
Setup Fails or Hangs
Problem: The /setup command fails partway through or seems stuck.
Solution: Run /debug inside Claude Code. This skill performs a deep investigation and often fixes the issue automatically. If it finds a problem that likely affects other users, consider opening a PR to improve the setup skill.
Docker Permission Denied
Problem: docker: Got permission denied while trying to connect to the Docker daemon socket
Solution:
sudo usermod -aG docker $USER
newgrp docker
Then restart your terminal or log out and back in.
WhatsApp QR Code Expired
Problem: The QR code disappears before you can scan it.
Solution: Restart NanoClaw and a fresh QR code will be generated. You have about 60 seconds to scan each code.
Agent Not Responding to Messages
Problem: You send messages but get no response.
Solution: Check the following:
- Make sure you are using the trigger word (default:
@Andy) - Verify NanoClaw is still running in your terminal
- Check that your API key is valid and has credits
- Ask Claude Code: “Why did this message not get a response?”
High Memory Usage
Problem: NanoClaw or Docker is using too much RAM.
Solution:
- On macOS: Adjust Docker Desktop memory limits in Settings → Resources
- On Windows/WSL2: Edit
C:\Users\YourName\.wslconfigto set memory limits - On Linux: Use Docker’s
--memoryflag or adjust container resource limits
Node.js Version Too Old
Problem: Setup fails with syntax errors or missing features.
Solution: NanoClaw requires Node.js 20+. Check your version with node --version and upgrade if needed. Using nvm is the easiest way to manage multiple Node.js versions:
curl -o- https://raw.githubusercontent.com/nvm-sh/nvm/v0.39.0/install.sh | bash
source ~/.bashrc
nvm install 20
nvm use 20
Container Build Fails
Problem: Docker image fails to build during setup.
Solution:
- Make sure Docker is running:
docker info - Check available disk space:
df -h(you need at least 5-10 GB free) - Try cleaning Docker cache:
docker system prune - On Apple Silicon: ensure you are using the ARM64 version of Docker Desktop
Security Model: Why NanoClaw Is Different
Security is a core design principle of NanoClaw, not an afterthought. Here is how it compares to other AI agent platforms:
- OS-level isolation: Agents run in actual Linux containers, not just behind application-level permission checks. Each container has its own filesystem and process space.
- Explicit mounting: Containers can only see directories that are explicitly mounted. Your host filesystem is invisible by default.
- Per-group isolation: Each conversation group gets its own container, its own
CLAUDE.mdmemory, and its own isolated filesystem. One group cannot access another group’s data. - Auditable codebase: With just a handful of source files, you can actually read and understand every line of code that NanoClaw runs. You do not need to trust a black box.
For the full security model, see the security documentation.
What Comes Next
Now that you have NanoClaw running, here are some next steps to explore:
- Add more channels: Try
/add-discord,/add-slack, or/add-gmailto expand your agent’s reach - Join the community: The NanoClaw Discord is active and helpful for troubleshooting and sharing customizations
- Contribute skills: If you build something useful, contribute it as a skill so other users can benefit from a
/add-your-featurecommand - Explore the docs: Visit docs.nanoclaw.dev for deep dives into architecture, security, and advanced features
- Read the source: The entire NanoClaw codebase is about 35,000 tokens. Ask Claude Code to walk you through it and you will understand every component in under an hour
Conclusion
NanoClaw represents a new approach to personal AI agents: small enough to understand, secure by design, and fully customizable. Unlike monolithic platforms with hundreds of thousands of lines of code, NanoClaw gives you transparency and control. Your agent runs on your machine, in isolated containers, with only the access you explicitly grant.
Whether you are on macOS, Windows via WSL2, or Linux, the setup process is remarkably consistent: fork the repo, start Claude Code, run /setup, and you are up and running. From there, connecting WhatsApp or Telegram takes just one more command, and customization is limited only by your imagination.
The NanoClaw setup process is intentionally AI-native. There is no installation wizard, no monitoring dashboard, no debugging tools in the traditional sense. Instead, Claude Code is your setup assistant, your monitoring system, and your debugger all at once. When something goes wrong, you describe the problem and Claude fixes it. That is the future of personal software.
Ready to get started? Fork NanoClaw on GitHub and have your own AI agent running in under 15 minutes.
For more AI agent tutorials and self-hosting guides, explore AI Tools Hub — we test every tool so you can build your own AI setup with confidence.
Alex Kim is an AI tools reviewer and tech writer with over 5 years of experience evaluating SaaS and AI products. He specializes in hands-on comparisons of AI writing assistants, coding tools, and productivity software — testing each tool through real-world workflows before publishing any recommendation. His mission at AI Tools Hub is to help readers cut through the hype and find AI tools that actually deliver results.